14 July 2017
HOW TO TURN A FOOT-RING ON A BOWL
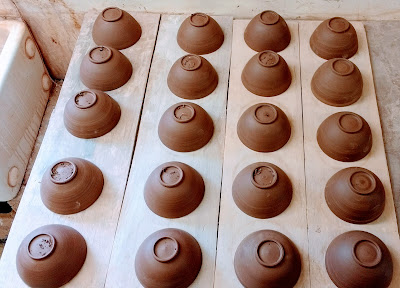
The condition of the clay has to be just right for turning, not too wet and not too dry. I am waiting for these little bowls to harden off so I am writing about it before I do it. The usual description of the correct clay condition is "leather hard", which doesn't communicate much. "Cheese hard" is also used, but what sort of cheese? A sort of old, mature cheddar, I'd say. The clay must not flake or crumble when it's cut with the turning tool, and it must not stick.
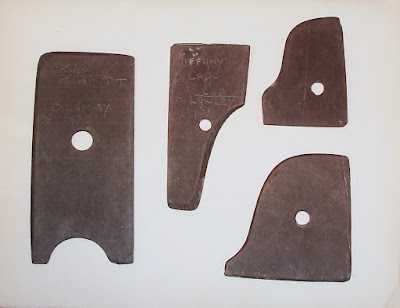
So what exactly is "turning"? A shape is made by throwing soft clay on the wheel, but you can't shape the bottom like that. You have to let it harden, turn it over, spin the wheel and trim it with the sort of tools you see in the top right of the picture above. In the process, a narrow foot-ring is cut into the base, which allows the item to stand on a flat surface without wobbling and also allows a narrow band of glaze to be rubbed off before placing in the kiln so that the pot doesn't stick to the kiln shelf when the glaze melts. Otherwise, the base has to be supported on pointed stilts in the kiln. I only turn bowls and plates, though some potters turn tall shapes like mugs and vases. I suppose I should, but I'm rather lazy and it's not absolutely necessary.
For this purpose studio potter turn the pot upside down on the wheel, though the pottery industry, when it still shapes pots this way, uses a horizontal lathe. When throwing was the common method of making in the industry, the thrower was only concerned with shaping the inside of the pot, which he did with the aid of throwing ribs, and the outside was formed by the turner. William Morris and the early studio potters scorned turning of this sort, but that was one of their many irrational prejudices.
Here are some old potters' ribs made from slate, used by potters at Minton's in the 1930s.
I got them from an old potter who used to work for Minton's. The process is described in more detail in an earlier blog post here.
When you are turning a run of bowls the same size, you want to form a hump of clay on the wheel head that's the same shape as the inside so that each one can be popped on and off quickly. This is called a "chuck". The chuck doesn't want to stick to the inside of the bowl, so it mustn't be wet. If you want to use it straight away after throwing it, dry it with a blow torch. For a large single item, centre it on the wheel head and hold it in place with three dabs of soft clay.
Assess the thickness of the base by putting the bowl on a flat surface, placing a stick across the top and measuring the distance from rim to inside bottom and rim to surface and then subtract. The thickness to leave after turning should be roughly that of the wall of the bowl - mine are 5mm to 7mm depending on size. Look at the inside bottom and judge the width of the foot-ring according to practical and aesthetic criteria.
The procedure is to first cut the outside of the foot ring and shape down to the rim of the bowl, and only when that's done shape the inside of the foot ring. The bowl is spun rapidly and the turning tool is brought gently into contact with the surface to cut away excess clay. Have a file by your side and keep the tool sharp - clay will blunt it quickly. The height and shape of the foot-ring is a matter of aesthetic judgement (I don't like a high footring or one that splays out or turns in excessively) but the thickness should echo the thickness of the rim. It is common for beginners to cut a wide foot ring with a square section, which looks crude. The edge of the foot ring should either be chamfered on both edges or rounded off. A small delicate item can have a very small foot ring, as on this saucer that I made. The foot ring was glazed in this case, so the saucer was supported on stilts, whose marks are clearly seen.
POSTSCRIPT
Here they are all done.
Subscribe to:
Post Comments
(
Atom
)


No comments :
Post a Comment